TARDIS - Prototyping the windows
I loved this part. Very technical, very precise, and easier than I dreaded!
So the hammered glass measures slightly thicker than 1/8", so I cut a groove along all the rails to be about 3/16" wide, aligned in the center. To be certain that the groove was in the center, I set my table saw to cut slightly more towards one side and cut it twice -- once from either end. This way, with a 1/8" table saw ever so slightly off center, I ended up cutting a 3/16" groove down the exact center of each board.
With that out of the way, I cut and made sure to trim each set of similar length pieces together, so if there was any error, it would still measure square. I set the table saw to precisely remove 3/8" of wood (testing it a number of times on scrap wood), and cut out each slot so the splines (if that is the word) precisely matched up and fit together perfectly. I used the same trick of flipping the piece of wood around to cut the two slots in the horizontal pieces so they would also measure exactly a third of the way across.
Finally, I remembered an old trick from long ago: Masking tape! Wrap each wood at the cut line with masking tape before you mark it. This does two things. First, it makes the cut lines easy to see. Second, and most important, it stops the wood from splintering or fraying at the cut line. I didn't do it for most of the prototype, but then I remembered... and am now properly armed to make the windows.
A note on the design:
I plan on gluing the center spline, and possibly using a finishing nail on either side. The top and bottom I will position and put some rubber cement in the joint, and drill in from either side and place a dowel. This will still give the window strength, but will allow me to remove the two dowels at a future point if needed to remove and replace a window pane. I will likely need to put finishing nails in the top and bottom rails as well to make sure the inner splines are attached.
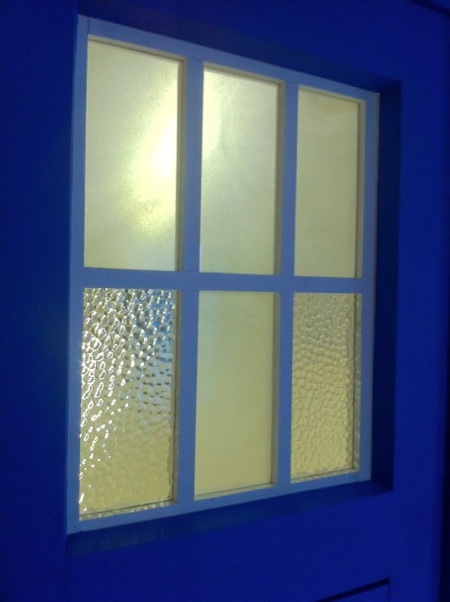
Here are pics of the disassembled window, and the assembled unglued prototype. The pieces on the left are all 1/2" x 3/4" wide, and the pieces on the right side are 3/4" x 3/4" for the outer frame. The resulting window will sit behind the door and still expose 1/2" wood and sit behind the door 1/4" on either side, cutting out bleeding light.
I do intend to sit the windows inside of frames that can open with hinges, so there is more to do still...


Comments
Post a Comment